
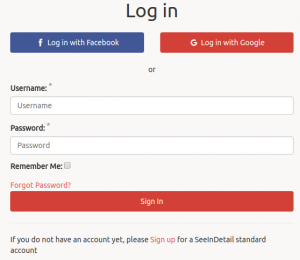
You want to create a Django website with social authentication, that is with such a login form :
and still having the possibility to create a local account if the user wants to, such a sign-up form would look like this :
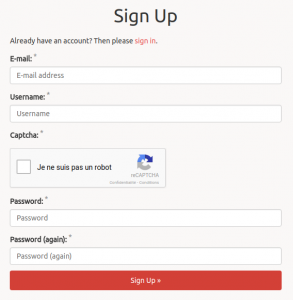
Note the captcha to check the user is not a robot.
Of course, you want all email checking stuff and so on. There is a very interesting application for that : django-allauth, it does a lot of things, but requires many configurations, here is the procedure I followed :
1. Install the applications
You have to install django-allauth AND django-recaptcha2 python packages (in my case, it was in a virtualenv)
|
1 2 |
pip install django-allauth pip install django-recaptcha2 |
Then declare them into Django settings.py in INSTALLED_APPS :
|
1 2 3 4 5 6 7 8 9 10 11 12 13 14 15 |
INSTALLED_APPS = [ 'django.contrib.admin', 'django.contrib.auth', 'django.contrib.sites', 'django.contrib.sessions', 'django.contrib.messages', ... 'myapp', 'allauth', 'allauth.account', 'allauth.socialaccount', 'allauth.socialaccount.providers.facebook', 'allauth.socialaccount.providers.google', 'snowpenguin.django.recaptcha2', ] |
Important : your application ‘myapp’ must be declared BEFORE ‘allauth’ ones. Otherwise, it is not possible to override django-allauth templates.
2. Get Facebook, Google and reCaptcha API keys
In order to get authenticated by facebook or google, you have to subscribe to their API and obtain public/secret keys.
2.1. Facebook API
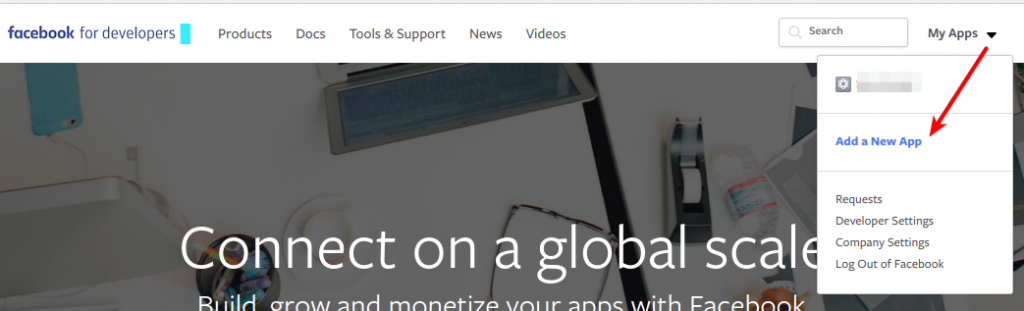
If not already done, create a facebook account, then log-in and go to https://developers.facebook.com/ and choose “My apps” in top menu : add a new app corresponding to your website or select it if already created :
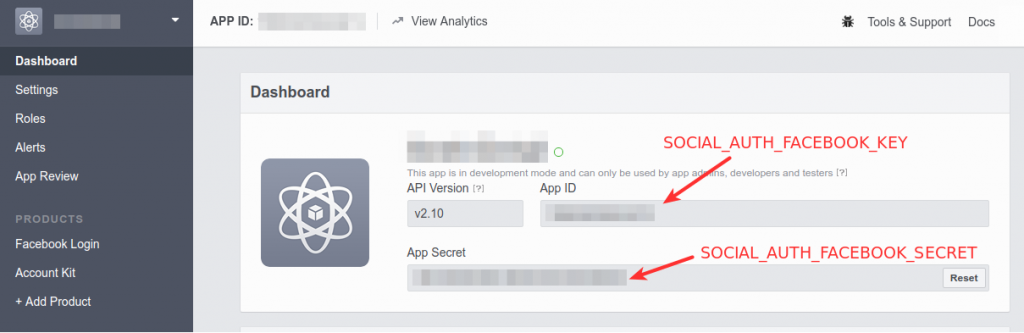
Go to the App’s dashboard and get App ID and App Secret, it will correspond to SOCIAL_AUTH_FACEBOOK_KEY and SOCIAL_AUTH_FACEBOOK_SECRET in settings.py :
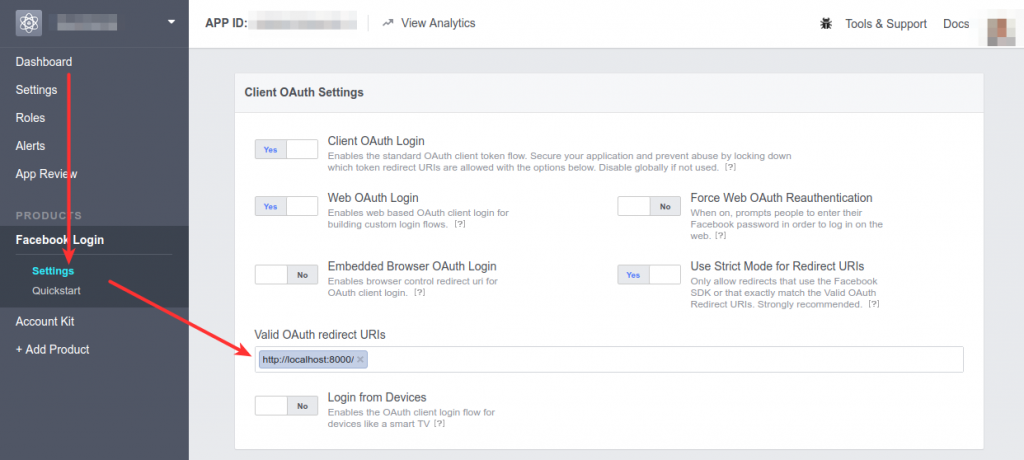
This is not finished, you must specify the authorized URL for authentication, in development mode, you would use http://localhost:8000 for Django runserver :
2.2 Google API
If not already done, create a google account, then log-in and go to the Google API page : https://console.developers.google.com/apis

- Enable APIs if needed
- Select dashboard
- Click on project select button in top menu
- Add your new project
Then create credential for your project :
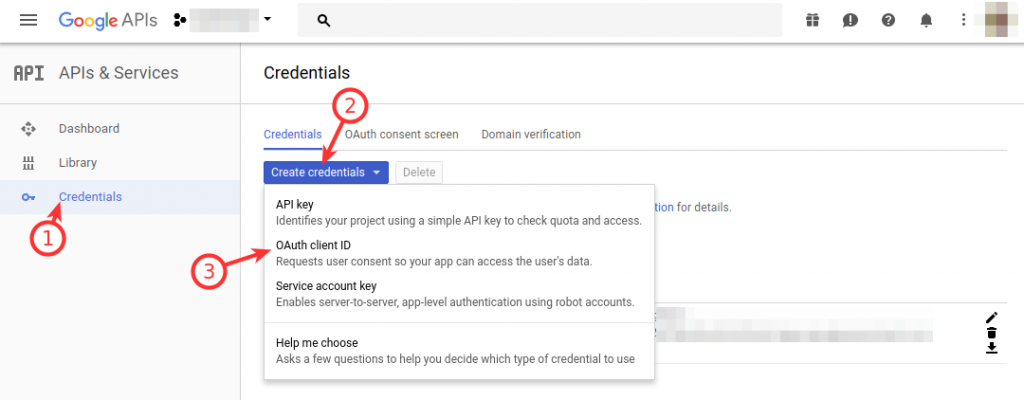
- Click on Credentials in side-bar
- Click on Create credentials button
- Choose OAuth client ID
On next screen choose “Web application” and fill the form like this:
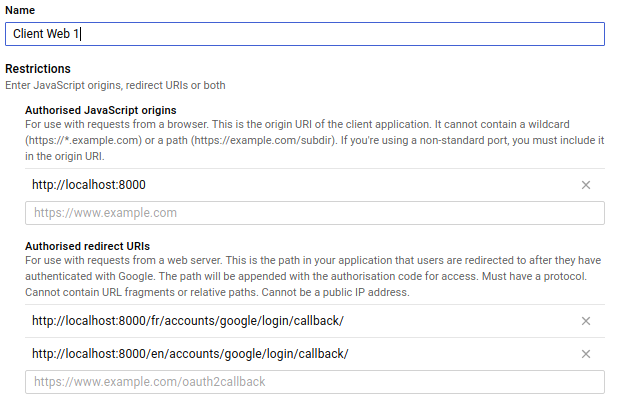
In my case, I am running Django in development mode (http://localhost:8000). Note the redirect URIs which must be exact. In my case, I am using Django internationalization framework, this is the reason why I have to specify ‘fr’ and ‘en’ in URIs. If your site has only one langage, the URI would be :
|
1 |
http://localhost:8000/accounts/google/login/callback/ |
Once done, just click on the credential you have created, you will get your keys :

Client ID and Client secret will correspond to SOCIAL_AUTH_GOOGLE_CLIENT_ID and SOCIAL_AUTH_GOOGLE_SECRET in settings.py
2.3 reCaptcha API
The reCaptcha I use is the version 2 provided by google. To get keys, you need to register your site here : https://www.google.com/recaptcha/admin
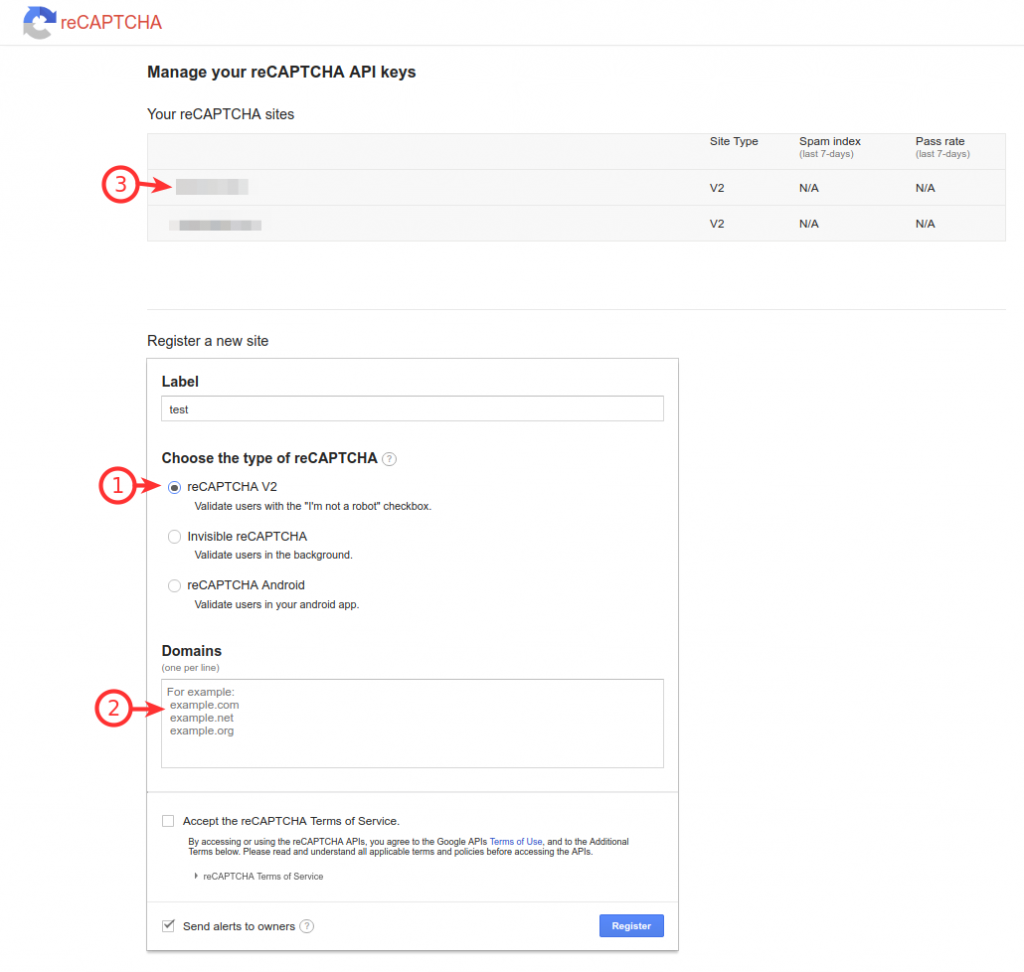
- Give a label to your site and choose reCaptcha V2
- Enter authorized domains, accept Terms of Service and click on register button
- Click on the site you just have added to get your keys

Site key and Secret key correspond to RECAPTCHA_PUBLIC_KEY and RECAPTCHA_PRIVATE_KEY in settings.py
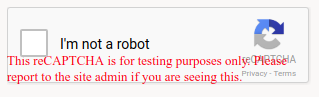
Note that for testing purposes (ie Django runserver), you can use test keys given by google (the ones I gave in the settings.py example below) :
|
1 2 |
RECAPTCHA_PUBLIC_KEY = '6LeIxAcTAAAAAJcZVRqyHh71UMIEGNQ_MXjiZKhI' RECAPTCHA_PRIVATE_KEY = '6LeIxAcTAAAAAGG-vFI1TnRWxMZNFuojJ4WifJWe' |
In this case, do not be surprised, you will have a beautiful red message telling you are testing reCaptcha :
3. Configure settings.py
Add this in your Django settings.py file :
|
1 2 3 4 5 6 7 8 9 10 11 12 13 14 15 16 17 18 19 20 21 22 23 24 25 26 27 28 29 30 31 32 33 34 35 36 37 38 39 40 |
# Put the site ID given in Django admin interface SITE_ID = 3 ACCOUNT_EMAIL_REQUIRED=True ACCOUNT_EMAIL_VERIFICATION='mandatory' ACCOUNT_USERNAME_REQURIED=True # Putting Keys in settings.py just to access them more easily if needed # Keys must be declared in Django admin interface / Social accounts / Social applications # SOCIAL_AUTH_FACEBOOK_KEY="1899092390404212" # SOCIAL_AUTH_FACEBOOK_SECRET="18b3cdb60495b19b8b57b43de4689250" # SOCIAL_AUTH_GOOGLE_CLIENT_ID="1084385898681-imsk4fclu2si2aj9ckhvrhjr7e3t4rkd.apps.googleusercontent.com" # SOCIAL_AUTH_GOOGLE_SECRET="H-6G2XyWGYc2S6shUw8N0HiJ" SOCIALACCOUNT_PROVIDERS = { 'facebook': {'METHOD': 'js_sdk', 'SCOPE': ['email','public_profile', 'user_friends'], 'FIELDS': [ 'id', 'email', 'name', 'first_name', 'last_name', 'verified', 'locale', 'timezone', 'link', 'gender', 'updated_time'], 'EXCHANGE_TOKEN': True, 'VERIFIED_EMAIL': False, 'VERSION': 'v2.10'} } LOGIN_REDIRECT_URL = '/' RECAPTCHA_PUBLIC_KEY = '6LeIxAcTAAAAAJcZVRqyHh71UMIEGNQ_MXjiZKhI' RECAPTCHA_PRIVATE_KEY = '6LeIxAcTAAAAAGG-vFI1TnRWxMZNFuojJ4WifJWe' ACCOUNT_SIGNUP_FORM_CLASS = 'myapp.forms.AllauthSignupForm' |
Update authentication backends :
|
1 2 3 4 5 6 7 |
AUTHENTICATION_BACKENDS = ( # Needed to login by username in Django admin, regardless of `allauth` 'django.contrib.auth.backends.ModelBackend', # `allauth` specific authentication methods, such as login by e-mail 'allauth.account.auth_backends.AuthenticationBackend', ) |
4. Configure Django admin interface
4.1. Declare your Site
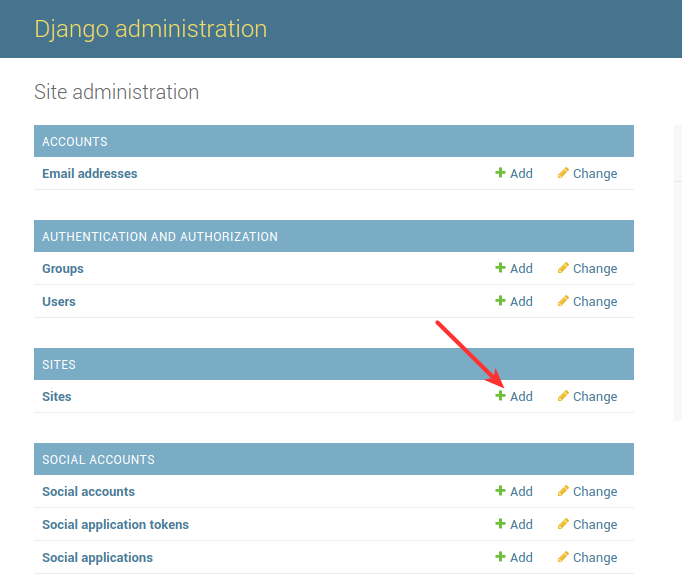
Django-allauth uses Django ‘Site’ framework : You must register your site in the django admin interface and get the Site ID you will specify in SITE_ID in settings.py :
If not already done, add your site in Django admin interface :
Enter the domain name (Could be a fake one when using django runserver) and the display name :
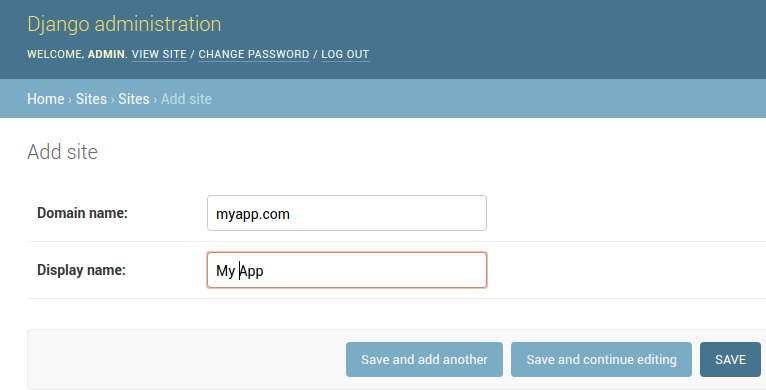
Save the form.
In order to get the Site ID, it is not obvious : you must select your site in the list and watch the URL :
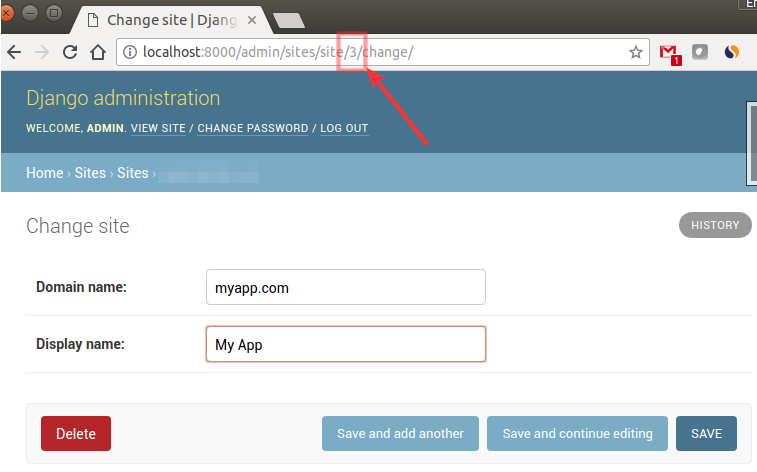
In my case, the ID is 3 (So I put SITE_ID=3 in settings.py). If you specifiy a bad SITE_ID, django will complain.
4.2 Add Facebook and Google social applications
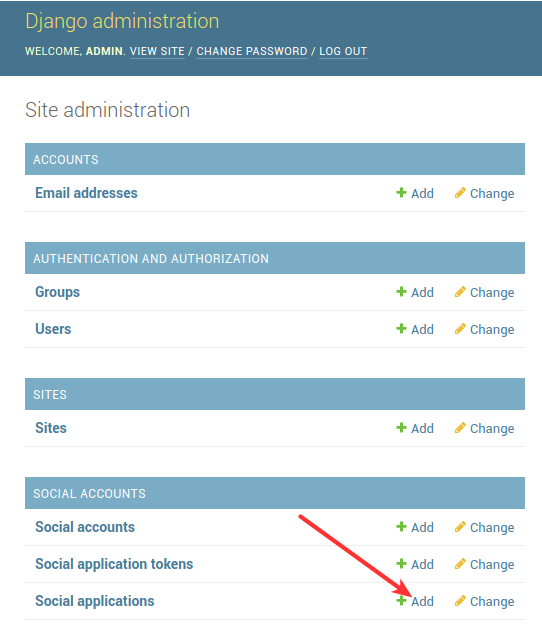
Django-allauth requires that you create 2 entries in Social applications tables, one for each authentication API (Facebook and Google in my case) :
For Facebook, enter this :
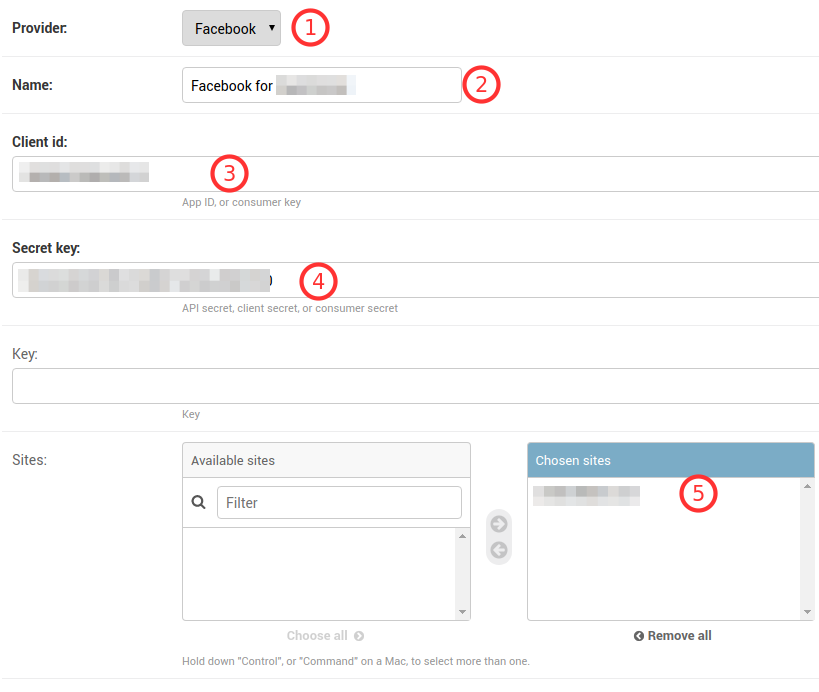
- Select the facebook provider
- Give the name you want
- Client id correspond to Facebook App ID
- Secret key correspond to Facebook App Secret
- Select the site you added in step 4.1
For Google enter this :

- Select the Google provider
- Give the name you want
- Client id correspond to Google Client ID
- Secret key correspond to Google Client Secret
- Select the site you added in step 4.1
5. Update urls.py
In my case, I am using Django internationalization framework, so I added in my urls.py :
|
1 2 3 4 5 |
from django.conf.urls.i18n import i18n_patterns urlpatterns += i18n_patterns( url(r'^accounts/', include('allauth.urls')), ) |
If you do not use internationalization, do not use il8n_patterns() and just declare django-allauth urls as usual by adding them in urlpatterns :
|
1 |
url(r'^accounts/', include('allauth.urls')) |
6. Add reCaptcha v2 in Sign-up form
django-allauth does not support Captchas, but give the possibility to redefine forms. Here I modified the Sign-up form by adding in my myapp/forms.py :
|
1 2 3 4 5 6 7 8 9 10 11 |
from django import forms from snowpenguin.django.recaptcha2.fields import ReCaptchaField from snowpenguin.django.recaptcha2.widgets import ReCaptchaWidget class AllauthSignupForm(forms.Form): captcha = ReCaptchaField(widget=ReCaptchaWidget()) def signup(self, request, user): """ Required, or else it throws deprecation warnings """ pass |
As you should noticed, I declared this form to django-allauth in settings.py :
|
1 |
ACCOUNT_SIGNUP_FORM_CLASS = 'myapp.forms.AllauthSignupForm' |
7. Templates
If you do not want to rewrite all django-allauth templates, you have to customize your templates in some ways. Here is the files tree I have :
- myapp
- templates
- account
- base.html
- login.html
- signup.html
- accounts
- profile.html
- base.html
- account
- templates
7.1 myapp/templates/base.html
The myapp/templates/base.html is important because django-allauth built-in templates are extending this template. So I choose to use it to be my project base template too. This implies to use some specific block name. The myapp/templates/base.html should looks like this :
|
1 2 3 4 5 6 7 8 9 10 11 12 13 14 15 16 17 18 19 20 21 |
{% load static i18n %} <!DOCTYPE html> <html lang="en"> <head> <title>{% block head_title %}{% endblock %} | Myapp</title> {% block viewport %}{% endblock %} {% block extra_head %}{% endblock %} </head> <body> {% block body %} {% block messages %}{% endblock %} <div id="content-section" class="{% block content-class %}content-general{% endblock %}"> <div class="container"> {% block content %}{% endblock %} </div> </div> {% block extra_js %}{% endblock %} {% endblock %} {% block extra_body %}{% endblock %} </body> </html> |
7.2 account/base.html
I customized this template in order to add a specific css class on the container div when displaying built-in django-allauth templates :
|
1 2 |
{% extends "base.html" %} {% block content-class %}content-account{% endblock %} |
7.3 login.html
Finally, here is my custom login template :
|
1 2 3 4 5 6 7 8 9 10 11 12 13 14 15 16 17 18 19 20 21 22 23 24 25 26 27 28 29 30 31 32 33 34 35 36 37 38 39 40 41 42 43 44 45 46 47 48 49 50 51 52 53 54 55 56 57 58 59 |
{% extends "account/base.html" %} {% load i18n %} {% load account socialaccount %} {% block content-class %}content-account{% endblock %} {% block head_title %}{% trans "Sign In" %}{% endblock %} {% block content %} <h1>{% trans "Log in" %}</h1> <form method="POST" action="{% url 'account_login' %}"> <div class="row"> <div class="col-md-12 text-center"> </div> </div> <div class="row"> <div class="col-md-6"> <a href="{% provider_login_url "facebook" method="js_sdk" %}" class="btn btn-block btn-facebook"> <span class="icon-facebook12"></span> Log in with Facebook </a> </div> <div class="col-md-6"> <a href="{% provider_login_url "google" method="js_sdk" %}" class="btn btn-block btn-google"> <span class="icon-google"></span> Log in with Google </a> </div> </div> <div class="row"> <div class="col-md-12 text-center"> <br> <p>{% trans "or" %}</p> </div> </div> <div class="row"> <div class="col-md-12"> {% include "socialaccount/snippets/login_extra.html" %} {% csrf_token %} {{ form.as_p }} {% if redirect_field_value %} <input type="hidden" name="{{ redirect_field_name }}" value="{{ redirect_field_value }}"/> {% endif %} <a class="button secondaryAction" href="{% url 'account_reset_password' %}">{% trans "Forgot Password?" %}</a> <button class="primaryAction" type="submit">{% trans "Sign In" %}</button> </div> </div> <div class="row"> <div class="col-md-12"> <hr> <p>{% blocktrans with site.name as site_name %}If you do not have an account yet, please <a href="{{ signup_url }}">Sign up</a> for a {{ site_name }} standard account{% endblocktrans %}</p> </div> </div> </form> {% endblock %} |
7.4 signup.html
The template to sign-up is :
|
1 2 3 4 5 6 7 8 9 10 11 12 13 14 15 16 17 18 19 20 21 22 23 |
{% extends "account/base.html" %} {% load i18n %} {% load recaptcha2 %} {% block head_title %}{% trans "Signup" %}{% endblock %} {% block extra_head %}{% recaptcha_init %}{% endblock %} {% block content %} <h1>{% trans "Sign Up" %}</h1> <p>{% blocktrans %}Already have an account? Then please <a href="{{ login_url }}">sign in</a>.{% endblocktrans %}</p> <form class="signup" id="signup_form" method="post" action="{% url 'account_signup' %}"> {% csrf_token %} {{ form.as_p }} {% if redirect_field_value %} <input type="hidden" name="{{ redirect_field_name }}" value="{{ redirect_field_value }}" /> {% endif %} <button type="submit">{% trans "Sign Up" %} »</button> </form> {% endblock %} |
Note the {% load recaptcha2 %} and {% recaptcha_init %} to get reCaptcha widget displayed in the form.
That’s all …